
Installation Guide
Follow the steps below to ensure a smooth installation process:
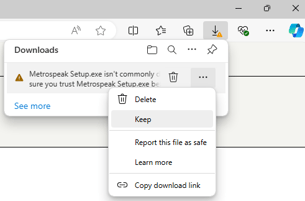
Download the Setup File:
If you encounter a warning about the file from your browser (e.g., Edge or Chrome), click on the '...' option or a similar menu and select 'Keep' proceeding with the download.
Run the Setup File:
After downloading, navigate to the location of the MetroSpeakLight Setup.exe file (usually in the Downloads folder).
Double-click the file to start the installation.
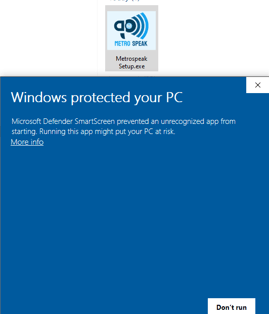
Addressing Antivirus and Security Warnings:
If Windows Defender or other antivirus software flags the setup file, a warning dialog may appear.
To bypass this warning, click on the More Info link in the dialog box, then select the Run Anyways button to proceed.
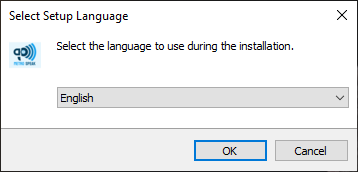
Installation Process:
The setup program will guide you through the installation steps.
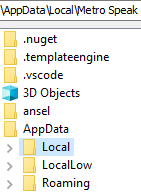
You will be prompted to choose the installation directory. The recommended location is within your AppData folder to avoid potential issues with system-level directories.
Installation Directory:
By default, the setup will install the program into C:Users\<Username>\AppData\Local\MetroSpeak\MetroSpeakLight.
If you choose to install into a different directory such as Program Files or Program Files (x86) the file path chosen may be denied by Windows. To remedy this, change your Windows user settings / privileges or install Metro Speak into a different directory.
Finalize Installation:
After selecting the appropriate installation directory, click Next and follow the remaining prompts to complete the setup.
Once the installation is finished, you can launch Metro Speak from the location where it was installed or from the Start Menu.

Overview
Add Audio:
This option allows the user to import audio files into the program. When clicked, it opens a file browser where you can navigate and select audio files (e.g., .wav, .mp3) to include in the announcement set.
One of Metro Speak’s convenient features is its ability to remember folder paths used for importing and exporting audio. Each time the user accesses audio files, the last used folder is saved for easy navigation, improving the workflow and speeding up the process of managing announcements.
Export Audio:
Export Audio is used to save selected audio files, or an entire announcement set to a new location on the user's system.
The program saves the current export folder path, allowing users to quickly export files to previously chosen directories without re-browsing each time.
New Announcement Set:
This option lets users create a new announcement set, which acts as a collection of audio files that can be organized and played through Metro Speak.
The user can add, remove, or reorder audio tracks within the set, ensuring flexibility in how the announcements are structured.
Save Announcement Set:
The Save Announcement Set function allows users to preserve the current state of their announcement set, including file order, folder paths, and any audio preferences.
This ensures that the announcement set can be reloaded later without the need to reconfigure the audio files or their order.
Delete Announcement Set:
This feature allows users to remove an entire announcement set from the program.
Deleting a set will not remove the actual audio files from the user's system but will clear them from the active Metro Speak interface, freeing up space for a new set or different configuration.
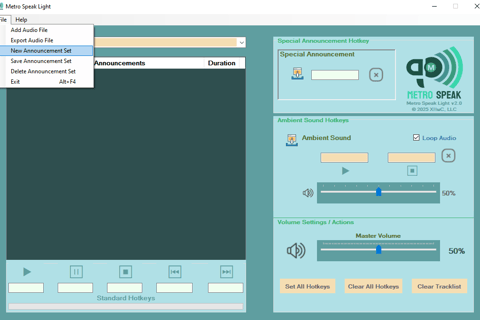
File Menu
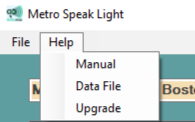
Help Menu
The Help menu includes three key options: Online Manual, Data File, and Upgrade.
Online Manual: Provides information about settings, properties, and methods for all of Metro Speak's features.
Data File: Opens the "MetroSpeakListData.json" Data File in Notepad for direct editing.
Upgrade: Takes you to the Metro Speak Full Edition store page.


Tutorial
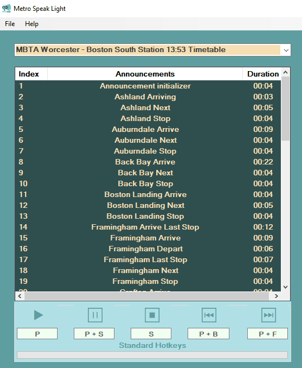
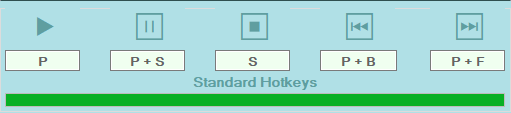
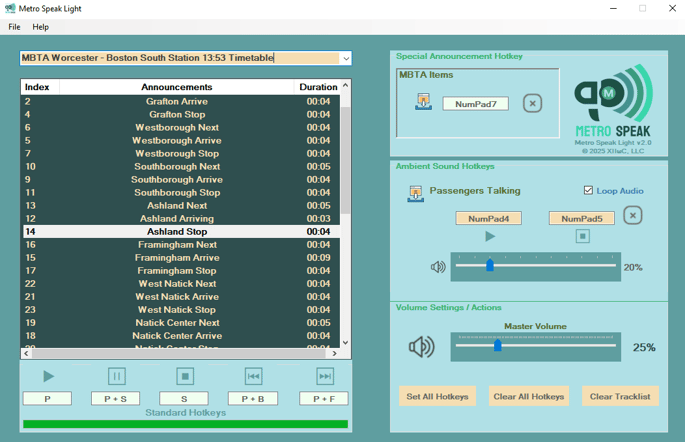
The Hotkey Player is the main interface where you can create new announcement sets, load, export, sort and remove audio files, adjust volume, and manage hotkeys.
All of the standard hotkeys on this player will override identical keyboard commands on other applications. If you use "Q" to acknowledge an alarm on a train and assign "Q" to play an audio file, the only action that will fire is the audio. The "Q" will not acknowledge the alarm, you will have to acknowledge the alarm by manually switching it inside the cab.
If you're new to hotkeys and also Metro Speak, here is a detailed guide on how to set up:
Start a New Announcement Set:
On the Metro Speak dialog, click File in the menu bar.
From the drop-down, select New Announcement. This will clear all fields in the dialog, preparing the interface for a new announcement set.
Name Your Announcement Set:
In the combo box dropdown, type in the name of the Announcement Set you wish to create. This name will help you organize and identify the set for later use.
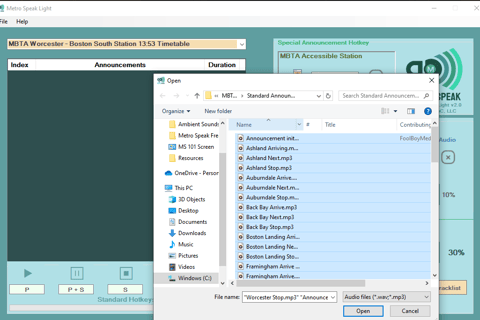
Add Audio Files:
After naming your set, go to the File menu and select Add Audio Files.
This will open a file browser. Navigate to the folder on your PC where your audio files are located.
Select the group of audio files you want to add to the announcement set. You can use the Shift key to select a continuous range of files or the Ctrl key to select specific files.
Populate the Playlist:
Once your audio files are selected, click the Open button in the browser dialog. The Metro Speak playlist will now be populated with the audio files you chose.
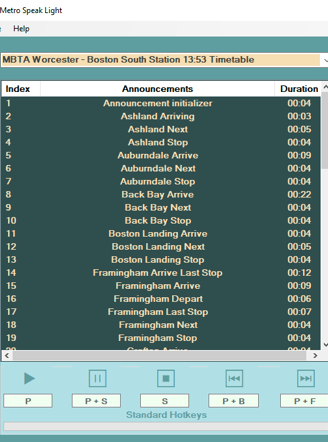
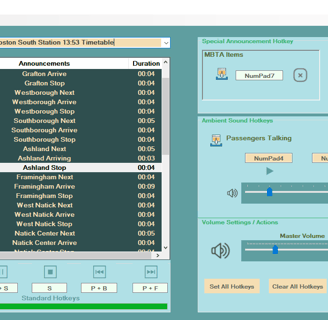
Each entry in the playlist (shown in the list box) will include:
An Index Number (displayed on the left).
The Name of the Audio File (without the folder path or file extension).
The Duration of each audio file.
The audio files will appear in the same order as they were in the source folder.
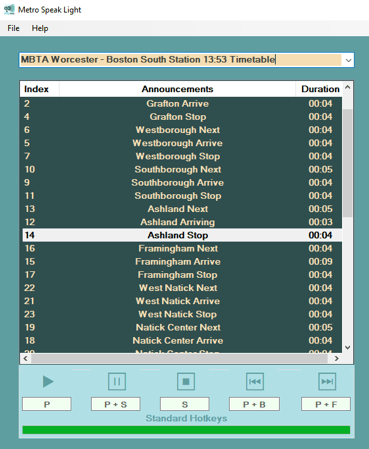
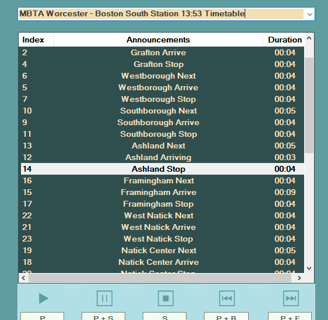
Order of Audio Files:
For many train announcements, the audio files are numbered, ensuring that they play in the correct order corresponding to the train stations.
If your audio files are not numbered and are listed alphabetically, you can reorder them manually:
Drag and Drop: Left-click on an individual audio file in the list, hold the left mouse button, and drag the file to its appropriate index position. Release the mouse button to drop the file into its new location.
Remove an Audio File:
If you wish to remove an audio file from the set:
Left-click on the desired file in the playlist to select it.
Right-click on the file, and a message box will appear, confirming the index number of the selected audio file.
Choose Yes to remove the audio file from the list, and it will be removed but not deleted from its original folder.
Assigning and Changing Hotkeys:
Assigning Hotkeys to Playback Functions:
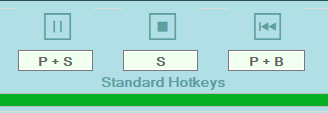
In Metro Speak, you can assign hotkeys to the primary playback functions: Play, Pause, Stop, Play Previous, and Play Next.
To assign or change a hotkey, simply click on the hotkey text box corresponding to the desired function (e.g., Play, Pause).
Press the key(s) you wish to assign. For example, you can set a simple key like 'P' for Play or a combination like P + Oem7 (apostrophe key) to manage key space effectively.
Multiple Key Combinations:
Metro Speak supports assigning multiple key combinations to playback controls, which is particularly useful for users who want to minimize key conflicts with other software. For example, assigning P+B to playback or P+F to play forward ensures flexible control options.
Managing Hotkeys & Tracklist:
Set All Hotkeys:
Once you've assigned the desired hotkeys to playback functions, click the Set All Hotkeys button. This will activate the new hotkey settings for controlling Play, Pause, Stop, and other playback-related actions.
Clear All Hotkeys:
If you need to reset all hotkey assignments for playback functions, press the Clear All Hotkeys button. This will unhook all key bindings, leaving no active hotkeys for playback operations.
Clear Tracklist:
Clicking the Clear Tracklist button will instantly remove all audio files from the playlist, leaving the list box empty.
This action does not delete the actual audio files from your computer; it only clears them from the playlist in the current session.
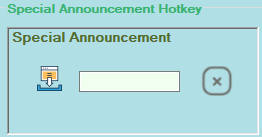
Special Announcements
Metro Speak Light includes one Special Announcement Hotkey, which offer exclusive functionality for making situational announcements. These announcements are triggered separately from the standard list and are designed to provide specific, real-time information during service operations.
Key Features of Special Announcement Hotkeys:
Context-Specific Announcements:
Special announcements are defined as those that deliver specific information related to the current situation of a train in service. These announcements typically include:
Safety messages
Delays
Service changes
Baggage reminders
They are often used to inform passengers of urgent or important updates that differ from the regular, pre-programmed station announcements.
Hotkey-Triggered Playback:
These announcements are triggered exclusively by hotkey commands. Unlike the standard announcements in the indexed list box, special announcements cannot be played through regular playback controls—they must be initiated using their assigned hotkeys.
Independent from Standard Announcements:
The audio files used for special announcements are completely independent of the standard announcement audio files. This provides flexibility, allowing the special announcements to be managed and played without interfering with the main audio set.
Mutual Exclusion with Standard Announcements:
If a special announcement is playing and a standard announcement is triggered, the special announcement will stop, and the standard announcement will play.
Conversely, if a special announcement is keyed while a standard announcement is playing, the standard announcement will stop to allow the special message to take precedence.
Shared Volume Control:
Both special announcements and standard announcements share the same volume control, which is managed by the vertical volume slider in the middle of the dialog. This unified control ensures consistent audio levels across all announcement types.
Adding a Special Announcement:
To add a special announcement, follow these steps:
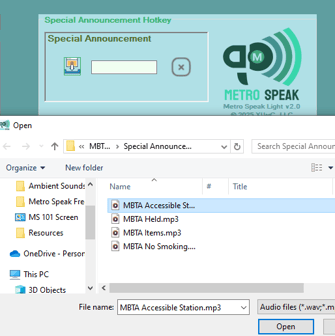
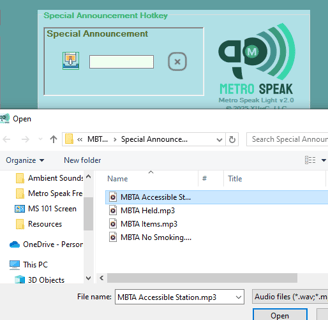
Browse and Import Audio:
Click on the Folder-style 'Browse' button to open a file browser.
Navigate to the location of the special announcement audio file on your computer and select it.
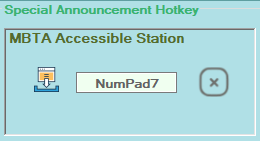
Once imported, the title of the special announcement audio file will appear directly above the special announcement controls on the dialog.
Assign Hotkeys:
Click in the hotkey text box.
Key in the desired hotkey(s) command (e.g., NumPad7 or any other key combination).
Once you've entered the hotkey, click on the Set All Hotkeys button to activate the special announcement hotkey.
Clearing Special Announcement Hotkeys:
If you need to clear the hotkey for a special announcement, simply click on the Clear Special Announcement button assigned to the corresponding text box.
This will unhook the hotkey, making the control available for a new assignment if needed, while leaving hotkeys for other announcement types unaffected.
Ambient Sounds
Ambient sounds in Metro Speak Light are background audio tracks that can enhance immersion during an announcement session. Examples of ambient sounds include nature, traffic, crowds, and radio chatter (commonly used on freight trains). Metro Speak allows the use of one independent ambient sound that can play alongside both standard and special announcements.
Key Features of Ambient Sounds:
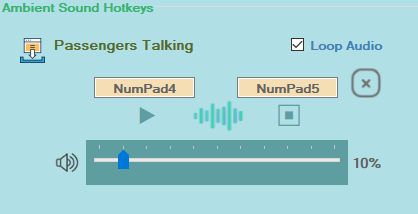
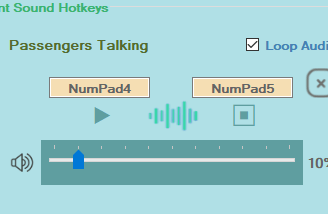
Independent Playback and Control:
Each ambient sound has its own Play and Stop buttons, along with corresponding hotkey text boxes for quick control.
Ambient sounds can play simultaneously with announcements without interrupting the main audio flow.
Independent Volume Controls:
Each ambient sound has its own volume control, allowing the user to adjust the levels independently from announcements.
Loop Audio Option:
Users can enable the Loop Audio option if they want the ambient sound to play continuously throughout the session.
If loop mode is enabled, the sound will restart when it reaches the end of the track.
Adding an Ambient Sound:
To add an ambient sound, click on the Folder-style 'Browse' button to import the desired audio file.
The audio file name will appear above the ambient sound controls, just like special announcements.
If you want the ambient sound to play throughout the route, simply press the Play button, and no hotkeys are needed.
Using Hotkeys for Specific Situations:
If you need the ambient sound for specific events, you can assign hotkeys for Play and Stop functions.
Click in the hotkey text boxes next to the Play and Stop buttons, then input the desired hotkey commands.
Hotkeys are useful for controlling ambient sounds during certain moments in the session.
Additional Uses:
Ambient sound slots can also be used for additional special announcements if needed. Simply make sure the Looping feature is unchecked so the announcement will stop playing when the track ends.
Clearing Ambient Sound Settings:
If you need to clear the hotkeys or audio file associated with an ambient sound, you can do so by clicking the 'clear ambient sound' button located next to the hotkey text boxes.
This will reset the hotkeys and audio file, making the slot available for new sound settings without resetting other hotkeys that are currently set throughout the dialog.
Saving a Newly Created Announcement Set
To save a newly created announcement set in Metro Speak, follow these steps:
Set Hotkeys:
Always click the Set All Hotkeys button first to ensure that all hotkey assignments are correctly applied to the audio files.
Save the Announcement Set:
From the File menu, select the Save Announcement Set option.
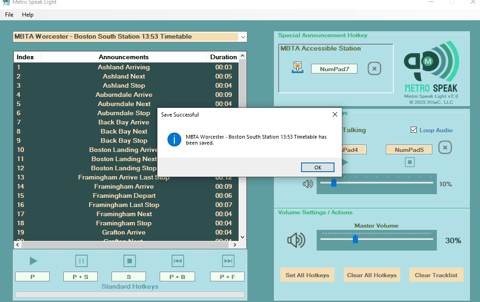
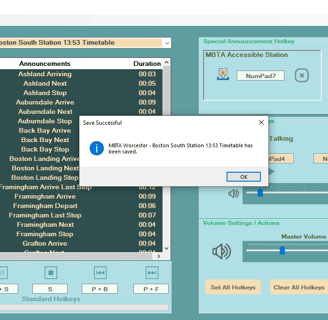
Confirm the Save:
A message prompt will appear to confirm that you want to save the announcement set. Review the set details and click OK to proceed.
Added to Combo Box:
Once confirmed, the newly created announcement set will be saved and added to the list in the Combo Box for future access.